— May 4, 2021
Learn how to build APIs with Next.js
Use the API routes feature in Next.js to build extensible serverless lambda functions, and learn about the basic steps of productive API design and development.
Read this story on Medium.
Next.js is a framework for React that makes developing SEO-friendly sites easy and effective for developers. Because it is loaded great features and has amazing documentation (along with an introductory course), Next.js is a great choice for developers of any experience level.
To most developers who have heard of Next.js, what comes to mind when it is mentioned is "front-end web development." However, many may not be aware of its API routes feature, which enables you to write your front-end and back-end code within the same codebase. When combined with a serverless platform like Vercel (which was developed specifically for Next.js) or Netlify, the API routes feature of Next.js gives developers the power to easily write lambda functions for their project's API.
In this tutorial, we will make use of this innovative feature to create a basic example of a real-world API. We will walk through the basic steps of productive API design and development, including topics such as logic abstraction, top-down design, and skeleton code. Once we have completed the API and you are interesting in going above-and-beyond, read the bonus "Integration testing" section and/or optional "Create a landing page" and "Deploy to Vercel" sections.
The project
Objective
For this project, we will create a basic API that lets its end users randomly generate phrases based on a given query; think of it like a computer filling in the blanks for a MadLibs game. Let's look at some examples of queries and possible responses:
the $animal jumped over the $nounmight respond withthe cow jumped over the moonorthe cat jumped over the river.
I like $gerund $pluralNounmight respond withI like dancing carsorI like bubbling buildings.
my $bodyPart is $adjectivemight respond withmy tonsil is arrogantormy forearm is dumb.
As you can see from these examples, the word type preceded by the $ character informs the API to replace it with a word. The word that it will replace it with is randomly generated from a list of words that the API will access.
API design
Before we get started coding the project, let's plan out how the API will work, and then how we plan on organizing our code
Routes
Next.js API routes adhere by the REST (representational state transfer) protocol, a standardized protocol used by the majority of internet APIs. As such, we have a great amount of flexibility for designing the routes of the API.
This API will accept two routes: one route will accept a slug, whereas another route will accept a JSON object with a query property.
- Slug route: in web development, a slug is the unique identifier of a URL, typically at the end of the URL. For example, in the URL
https://example.com/blog/this-is-the-post, the slug would bethis-is-the-post. For this API, the URL will look something like this:http://localhost:3000/api/[slug], where[slug]is replaced with the desired query. Because the URL of this route will change depending on the request, it is called a dynamic route. This API route will be performed by sending aGETrequest to the server with the desired query URL.
- Request Body API route: this API route will accepted a JSON object with the following format:
{ "query": QUERY }, whereQUERYis the desired format. This API route will not be performed simply by changing the URL; it must be performed through aPOSTrequest to the server, with the body of the request being the object with the described format.
All of these routes will be written as lambda functions, with the functions accepting a req request parameter (for interacting with the user's request) and a res response parameter (for interacting with the response data to send back to the user).
What is a lambda function?
In computer science theory terms, a lambda function is any function that is not bound to an identifier, also known as being anonymous. The theory behind lambda functions comes from the field of lambda calculus, and in essence they allow functions to be passed as parameters to other functions.
In terms of serverless computing, the phrase "lambda function" was popularized by the AWS Lambda service which allows you to write "functions" that act as API endpoints (similar to what we will be doing with Next.js API routes). Like the definition in terms of computer science theory, these serverless lambda functions are not bound to any server and are given to the serverless service to call when that API endpoint is reached (hence matching the functions-passed-as-parameters quality of computer science theory lambda functions).
Codebase structure
The most basic structure of a Next.js project is as follows:
1
2
3
- pages
  - index.js
- package.json
The pages/index.js file represents the index location of your website's router. If you had a /about page, this would correspond to the pages/about.js file, etc.
For this project, we will be using Typescript, so instead of .js, we will use .tsx. Additionally, because we are writing API routes, they must be located in the pages/api directory.
1
2
3
4
5
- pages
  - api
    - index.tsx
    - [slug].tsx
- package.json
The two files in the api directory will be the two API routes that were previously described: index.tsx will be used for the request body route, and [slug].tsx will be used for the slug route. [slug].tsx must be wrapped in brackets [] to tell Next.js that this is a dynamic route.
Finished code
As always, the code for this project is available on Github: https://github.com/chroline/words-aas. If you are interested in seeing the final product, visit https://words-aas.vercel.app/. You can test the API routes on this URL.
Setting up the codebase
Bootstrapping a Next.js project
To start, we can create a basic Next.js project. To do so, run:
1
2
3
npx create-next-app
# or
yarn create next-app
This will run the create-next-app CLI and will prompt you for your project name. I will call it words-aas for the sake of this tutorial.
Installing dependencies
Because this project will be using Typescript, we will need to install the typescript dependency, along with the typings dependencies for react, react-dom, and node. These dependencies are only used for development, so we will add them to devDependencies with the -D flag.
1
yarn add -D typescript @types/react @types/react-dom @types/nodeCreate the util/api.ts file
This file will contain all the logic for the API. Since we will have multiple API routes that share the same logic, it makes sense for us to adhere to the DRY (do not repeat yourself) principle and to abstract the logic into a single file that can be imported later on. That way, we can put all the complexities of the API logic away from the actual API routes which will make development much more efficient.
Depending on the structure of your project, you can create/use a lib directory as opposed to a util directory.
Creating skeleton API routes
Before we write the API logic, we can create the two skeleton API routes. Next.js houses API routes in the pages/api folder, so we will create the following two files:
pages/api/[slug].ts— the slug API route. Wrappingslugin brackets will tell Next.js that this is a dynamic route, and the slug will be passed to the lambda function.
pages/api/index.ts— the query API route. This route accepts a JSON object, so there is no need to make it a dynamic route.
Inside both of these files, we will create a basic API route:
1
2
3
4
5
import { NextApiRequest, NextApiResponse } from "next";

export default async (req: NextApiRequest, res: NextApiResponse) => {
  res.send("Hello world!");
};
To test these API routes, run yarn dev or simply next in your project. Then, visit http://localhost:3000/api in the browser and/or http://localhost:3000/api/[slug] ([slug] can be any string). You should be greeted with Hello, world! as a response.
Slug API route
The slug API route will take a slug string and transform it into a phrase. As previously mentioned, the slug will consist of a list of word types joined by a comma ,.
Because the slug API route is a dynamic route, the slug will be passed to us in the req.query object. We will need to explicitly tell Typescript that the req.query object contains a slug property, so we can use a type annotation (as { slug: string }) to fix this issue.
1
2
3
4
5
6
7
import { NextApiRequest, NextApiResponse } from "next";

export default async (req: NextApiRequest, res: NextApiResponse) => {
  const { slug } = req.query as { slug: string };

  res.send(slug);
};
To test this route, visit http://localhost:3000/api/the $pluralNoun is $gerund in the browser, and the slug you entered should be the response you are given.
Request body API route
The request body API route provides a lot more customizability to the desired phrase than the slug API route. As such, we will need to manipulate the provided query string to transform it into an array of word types, as we did for the slug API route.
Because this API route accepts a JSON object, we will use the req.body object as opposed to the req.query object. We will also explicitly tell Typescript that the req.body object contains a query property.
1
2
3
4
5
6
7
import { NextApiRequest, NextApiResponse } from "next";

export default async (req: NextApiRequest, res: NextApiResponse) => {
  const { query } = req.body as { query: string };

  res.send(slug);
}
To test this route, you can open a REST Client like Insomnia or Postman and test sending a JSON object with the query property to http://localhost:3000/api.
To learn more about testing these routes, scroll down to the bonus "Integration Testing" section.
Writing API logic
Here comes the fun part! Now that have phrases split up into individual words/word types within the skeleton API routes, we can open the util/api.ts file to code the API logic.
To create the API logic, we will follow the top-down design practice in which we break down the total API logic (the system) into individual functions (called sub-systems). Using this practice, we can put all the individual subsystems together as we complete the system, which allows us to be much more efficient than starting from the bottom-up.
The following functions will live in the util/api.ts file.
getWordFile
The getWordFile function accepts a wordType: string parameter, and returns a list of words that match the given word type.
1
2
3
4
5
6
7
const getWordFile = async (wordType: string) =>
  await (
    await fetch(
      (process.env.NODE_ENV === "production" ? "https://words-aas.vercel.app/db/" : "http://localhost:3000/db/") +
        wordType,
    )
  ).text();
This function fetches the file for the given word type. If you are a savvy full-stack developer, you may notice that we are actually using fetch on the server-side, and you may wonder, isn't fetch only supported on the browser-side? Yes, the fetch api is only natively supported in browsers, but Next.js provides a polyfill for the fetch api so we can use it on the backend!
The word files will be located in the public/db folder. To download them to use in your own project, you can download the word files folder.
getRandomWord
The getRandomWord function accepts a contents: string parameter, and returns a random word from the given contents.
The contents string is the return value from the getWordFile function, and is the contents of a word file.
1
2
3
4
5
6
7
8
9
10
11
const getRandomWord = (contents: string) => {
  contents = contents.replace(/[\r]/g, "");
  const words = contents.split("\n");

	// the last element in the words files is a blank line, so
	// we will remove it so as to not return an empty string!
  words.pop();

  const i = Math.floor(Math.random() * words.length);
  return words[i];
};
This function replaces all carriage returns with a blank string. Then, we can split the contents string into a list of words. From that list of words, we can find a random element and return it.
phraseGenerator
The phraseGenerator function accepts a words: string[] parameter, and returns the transformed phrase from the given words.
The words parameter is the list of word types that we obtained previously in the slug and query API routes.
1
2
3
4
5
6
7
8
9
10
11
12
13
14
15
16
17
18
async function phraseGenerator(words: string[]) {
  let phrase = "";
  const allWordTypes = ["adjective", "adverb", "animal", "bodyPart", "gerund", "noun", "pluralNoun", "verb"];
  for (let i = 0; i < words.length; i++) {
    const word = words[i];

    if (word === "" || (word === "a" && i === 0)) continue;

    if (word.slice(0, 1) === "$") {
      if (!allWordTypes.includes(word.slice(1))) throw Error("word type not found");
      else {
        const filePath = word.slice(1) + "s.txt";
        phrase += getRandomWord(await getWordFile(filePath)) + " ";
      }
    } else phrase += word + " ";
  }
  return phrase.slice(0, -1);
}
This function runs through all of the word types in the words parameter, and builds the phrase based on the following conditions:
- If the word is empty, OR the first word is "a" (remember, a phrase that starts with "a" is an edge case that we will deal with later), we will ignore it and
continue.
- If the word begins with the
$character, then it is a word type that we need to handle:
- Else, simply add the word to the phrase.
Now we have an (almost) fully generated phrase! Because there will be an extra space at the end, we can slice it off.
vowelTester
The vowelTester function accepts a phrase: string argument, and returns a boolean.
This function is used to determine if the first letter in the provided phrase is a vowel, which will then be used to determine if the first word "a" should be transformed into "an".
1
const vowelTester = (phrase) => new RegExp(/[aeiou]/gi).test(phrase[0]);This function uses a RegExp expression that tests globally (g) for vowels ([aeiou]) that are lowercase or uppercase (i).
phraseResolver
The phraseResolver function accepts a query: string argument, and returns a phrase string.
This function brings all of the previous sub-systems together.
1
2
3
4
5
6
7
export async function phraseResolver(query: string) {
  const words = query.split(" ");
  let phrase = await phraseGenerator(words);
  if (words[0] == "a")
    phrase = (vowelTester(phrase) ? "an" : "a") + " " + phrase;
  return phrase;
}
The query is split up by each occurrence of a space character. A phrase is generated from those words. If the first word is "a", the function tests for vowels to determine if the word should be kept as "a" or "an". Finally, the phrase is returned.
Phew, that was a lot of coding and a lot of (hopefully) straightforward logic. You can view the complete file on Github to review.
Putting it all together
Now that we have written the API logic, we can connect it to the skeleton API routes that we created earlier.
Slug API route
Here is the final code for the slug API route:
1
2
3
4
5
6
7
8
9
10
11
12
import { NextApiRequest, NextApiResponse } from "next";
import { phraseResolver } from "../../util/api";

export default async (req: NextApiRequest, res: NextApiResponse) => {
  const { slug } = req.query as { slug: string };
  try {
    const phrase = await phraseResolver(slug);
    res.json({ phrase });
  } catch (e) {
    res.status(400).json({ error: (e as Error).message });
  }
};
First, we try to resolve a phrase from the given slug. If this is successful, we send it to the user as a JSON object. However, if it is not successful, we tell the user we ran into an error. This might happen if, for example, the user requests a word type that does not exist in the database.
Request Body API route
The code for the request body API route is almost identical to the slug API route:
1
2
3
4
5
6
7
8
9
10
11
12
import { NextApiRequest, NextApiResponse } from "next";
import { phraseResolver } from "../../util/api";

export default async (req: NextApiRequest, res: NextApiResponse) => {
  const { query } = req.body as { query: string };
  try {
    const phrase = await phraseResolver(query);
    res.json({ phrase });
  } catch (e) {
    res.status(400).json({ error: (e as Error).message });
  }
};
Because we abstracted the API logic, we can simply import the phraseResolver function from the util/api.ts file in the lambda functions for both API routes.
You might notice that the logic within both lambda functions is almost nearly identical, too. Could we abstract that logic out as well so as to completely adhere to the DRY principle? Yes, we could, but it is typically considered best practice to encapsulate the req and res objects within the lambda function itself. This makes the lambda functions easier to understand because a programmer can immediately see what is being read from the req object and what is being sent back to the end-user with the res object.
Bonus: Integration Testing
In the world of software development, there are two main types of testing your code: unit testing and integration testing.
- Unit testing involves breaking down your code into the smallest individual units that can be tested. If your codebase uses proper top-down design, your code is already broken up into small units of code: each individual function is a unit that can be tested.
- Integration testing involves testing the behavior of your project/service as a whole. Whereas unit testing would test every individual sub-system, integration testing would test the entire system itself.
For this project, integration testing makes more sense since the amount of logic used is minimal. (For bigger projects, consider using a combination of both unit testing and integration testing to get the most thorough results.)
If you are using a JetBrains IDE like WebStorm or IntelliJ, follow method one. Otherwise, follow method two.
Method One: Using JetBrains IDEs
JetBrains IDEs that are suited for web development have a built-in way to test RESTful APIs – that is, APIs that adhere by the REST protocol.
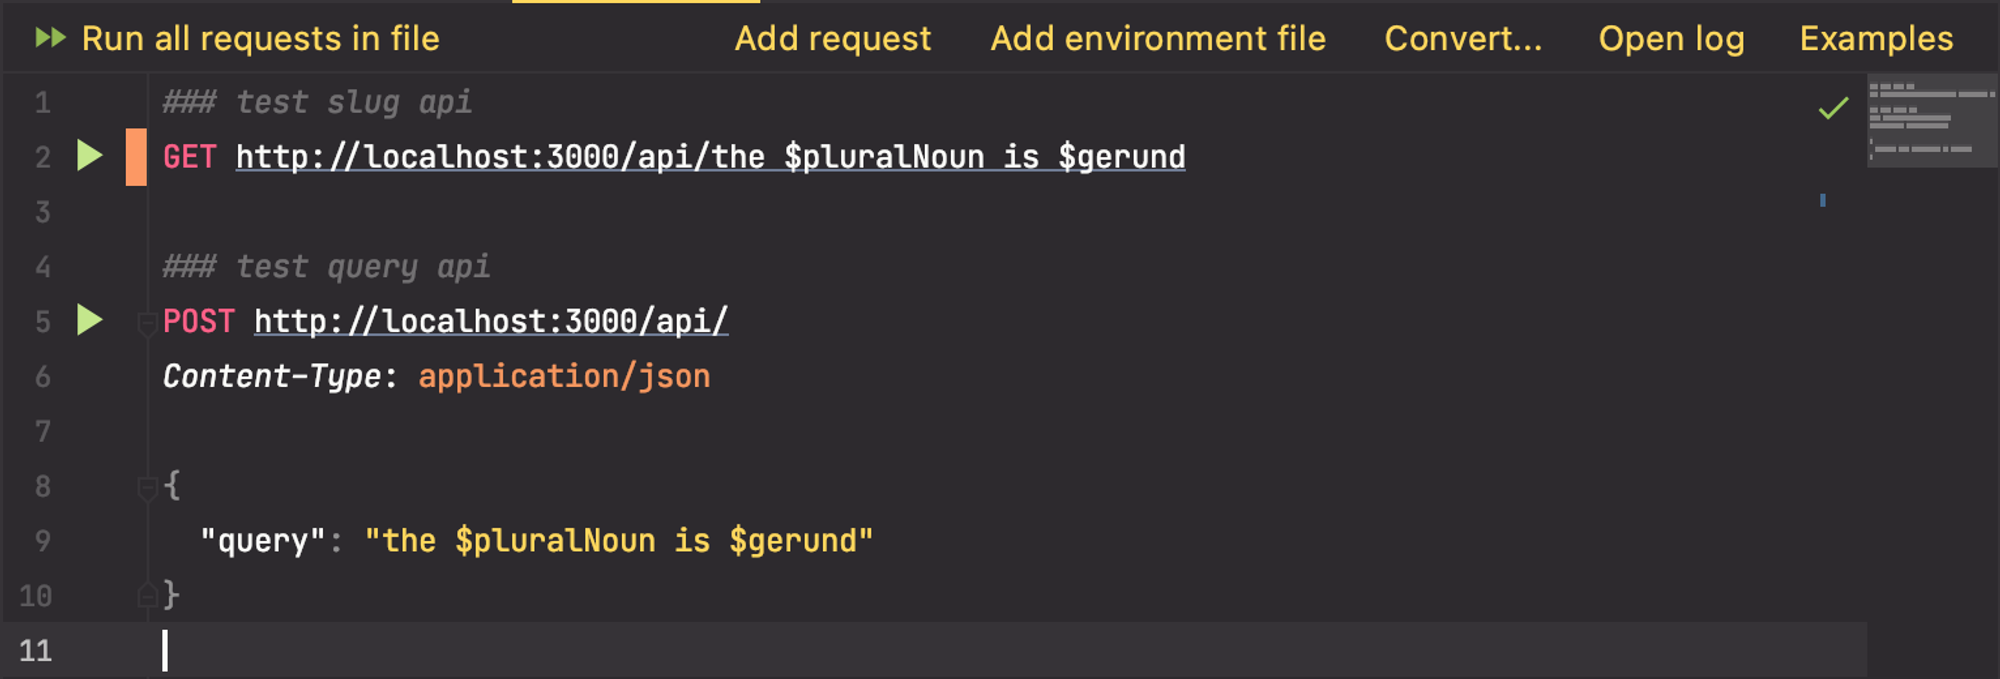
Open your project, and create a new HTTP file called test. Then, enter the following code:
1
2
3
4
5
6
7
8
9
10
### test slug api
GET http://localhost:3000/api/the $pluralNoun is $gerund

### test query api
POST http://localhost:3000/api/
Content-Type: application/json

{
  "query": "the $pluralNoun is $gerund"
}
This code runs two requests to the API: the first tests the slug route, and the second tests the request body route.
Once you have started your development server by running yarn dev or next in your project, click the Run all requests in file button and select "Run with no environment". A new panel should open in the bottom of your window.
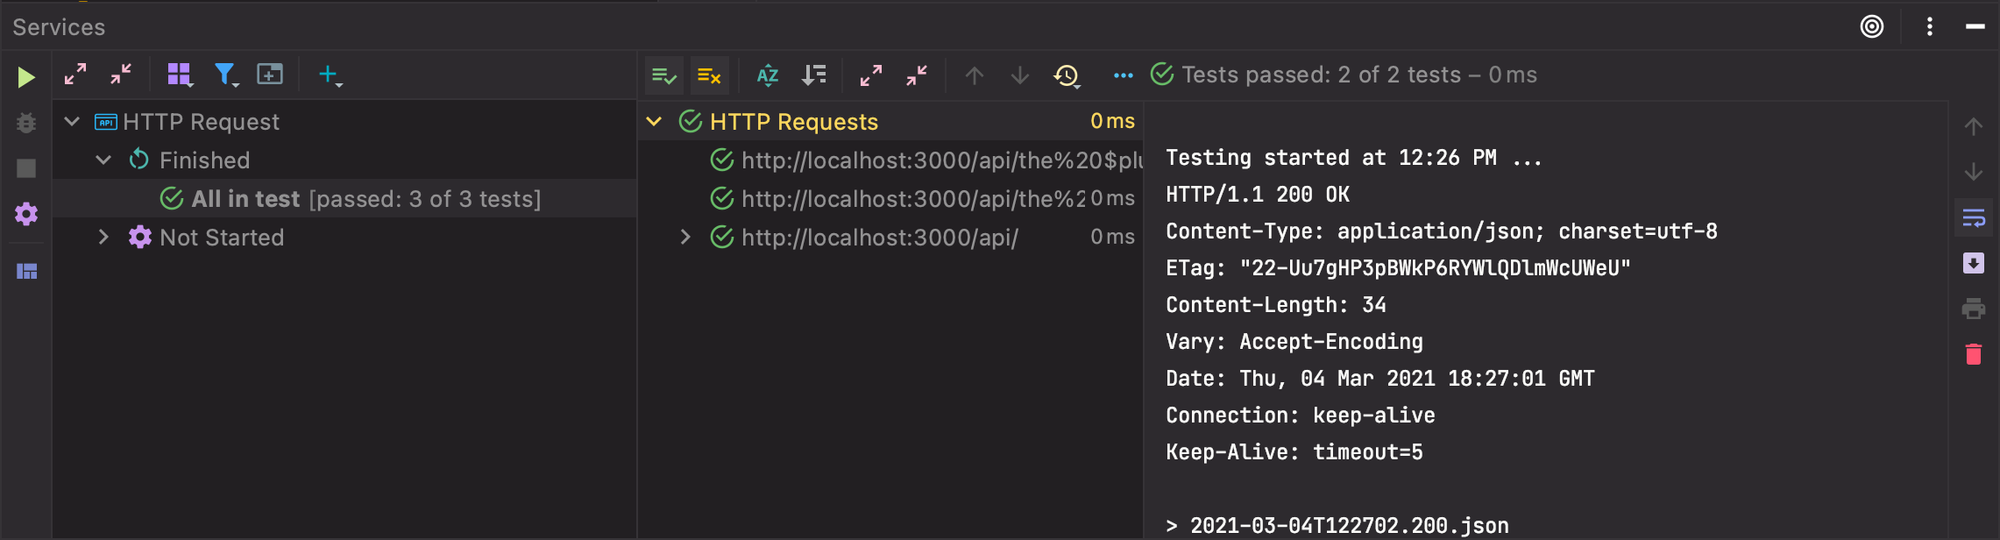
If all goes well, you should see a green check next to "All in test", which means that all of your requests were successfully completed. To verify the results of your requests, you can click on the file name in the output which will bring up the response text from the server.
Method Two: Using a REST client
There are a lot of great REST clients available to test out your RESTful API. The two most popular are Postman and Insomnia. I will be using Postman, but most of the steps should be similar in Postman or other REST clients.
First, create a new folder and call it API test.

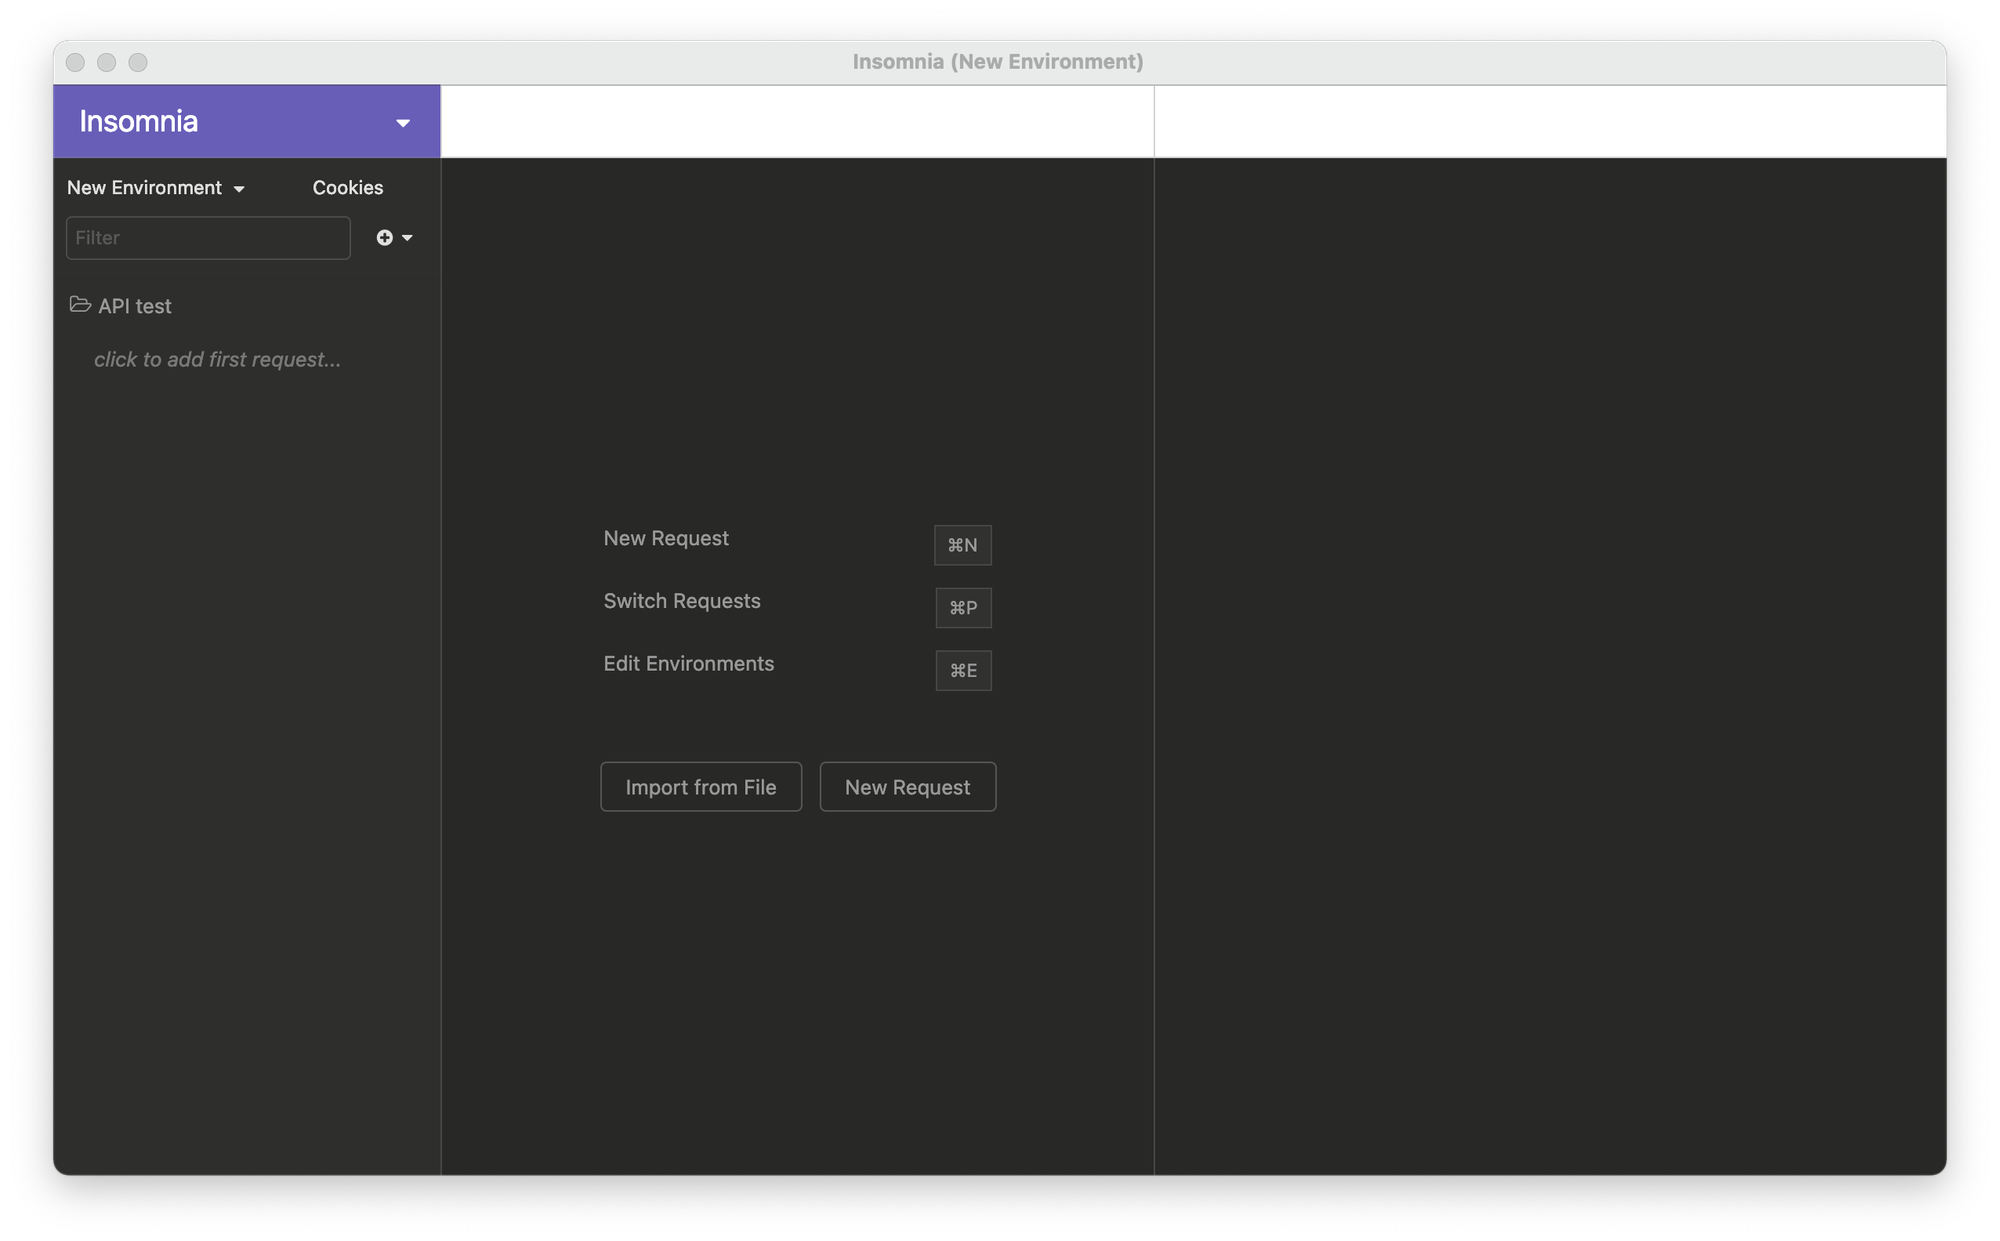
Then, add two requests:
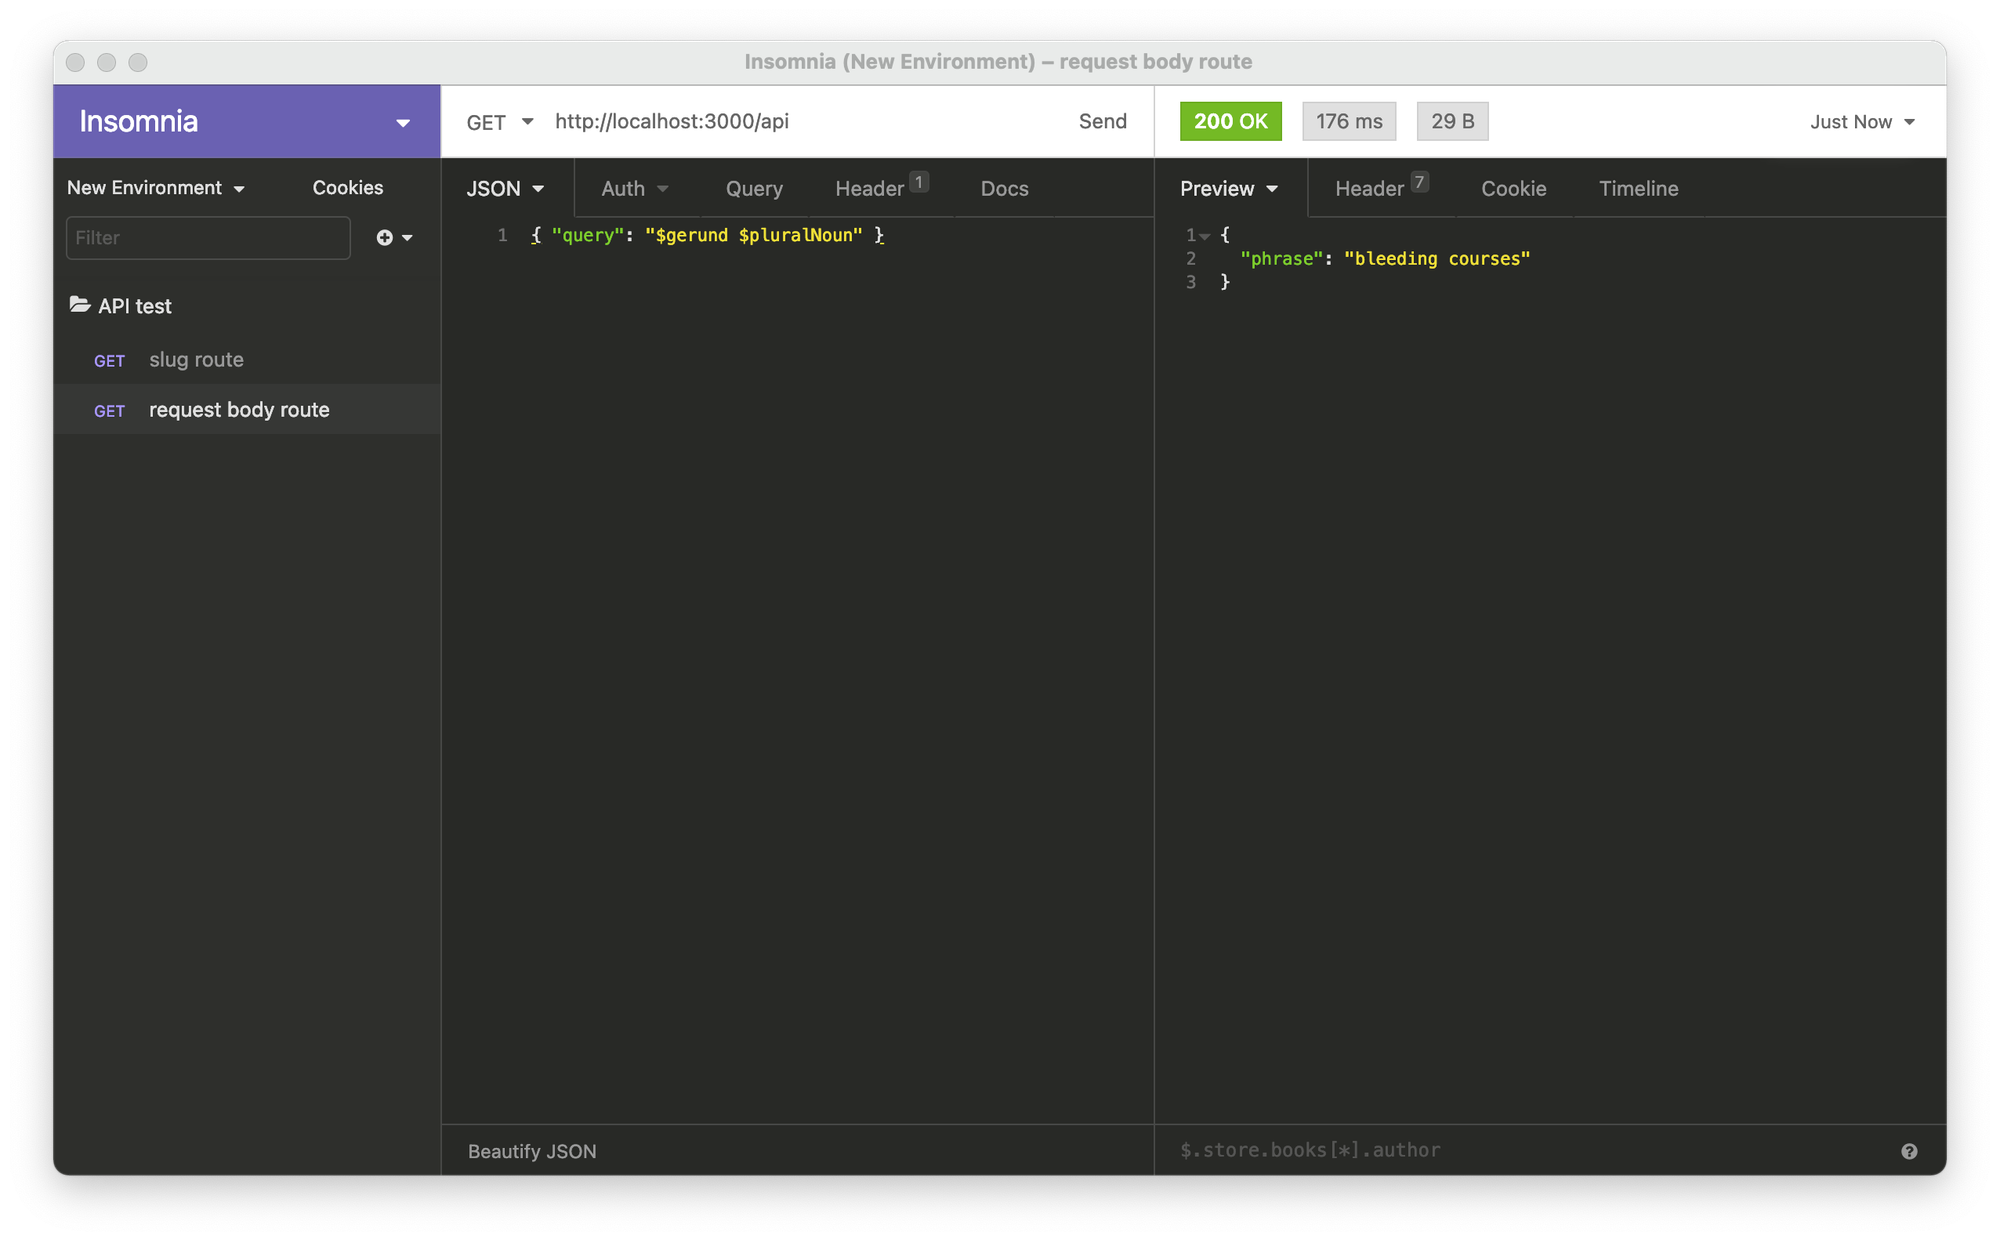
You can Send both of these requests, and if they succeed you should see the response on the right-hand panel of the window.
Wrapping up
Congratulations, we have finished our simple API project using Next.js! 🎉
What we just made is basic, but it hopefully gave you a good overview of what writing lambda functions for API routes in Next.js is like. If you found this tutorial helpful, stay tuned for a tutorial on more advanced practices for writing APIs with Next.js
If you are interested in going above and beyond with this project, read below for an optional and a bonus section to give your project an extra sense of completion.
Optional: Create a landing page
To attract more users, consider adding an attractive landing page for your service! Not only is Next.js great for creating serverless API routes, it is a framework for React. This means that you can create your front-end site and back-end logic within the same project.
The Next.js router corresponds the pathname of the URL to the file of the same name in the pages directory. For example, /about will correspond to the about.tsx or about.js file, and / will correspond to the index.tsx or index.js file. To make a homepage, create an index.tsx file within the pages directory.
1
2
3
4
5
import React from "react";

export default function Home() {
  return <h1>Hello world!</h1>
}
Within each file in the pages directory, there should be a default exported function. This function is what will be rendered when Next.js retrieves your file. Therefore, when your path is /, the JSX in the Home function will be rendered.
Use your React skills to create a landing page for your Next.js service.
Optional: Deploy to Vercel
Vercel is a platform that was developed specifically for Next.js that provides first-class support for API routes created with Next.js. Using their CLI, you can easily deploy your Next.js project to Vercel and share it with the world.
Download CLI
To download the Vercel CLI, run:
1
yarn global add vercelYou may have to run this command in sudo mode (only if absolutely necessary).
Login to Vercel
Before you can deploy your project, you must first login to Vercel. Run:
1
vercel loginThis will prompt you to login to Vercel in a browser window.
Deploy
Once you have logged in to Vercel, you can deploy by simply running:
1
vercelFollow the steps for deploying your project.
After the deployment has succeeded, it should provide you with a link to your hosted project. Now, you can share it with your friends and show them what you've made!
Subscribe to Instructive.dev
Don’t miss out on the latest content! Join over 3k+ devs in subscribing to Instructive.dev.
Join the mailing list